Our fireplace is definitely stuck in the 1980’s. Now that the adjoining kitchen has been renovated and the wall between the two spaces has been removed, the fireplace looks even worse than before. We also wanted to have one focal point for TV and fireplace, rather then the two walls they currently occupy. First step: whitewash the brick fireplace so it doesn’t look like a dinosaur in the newly opened space.
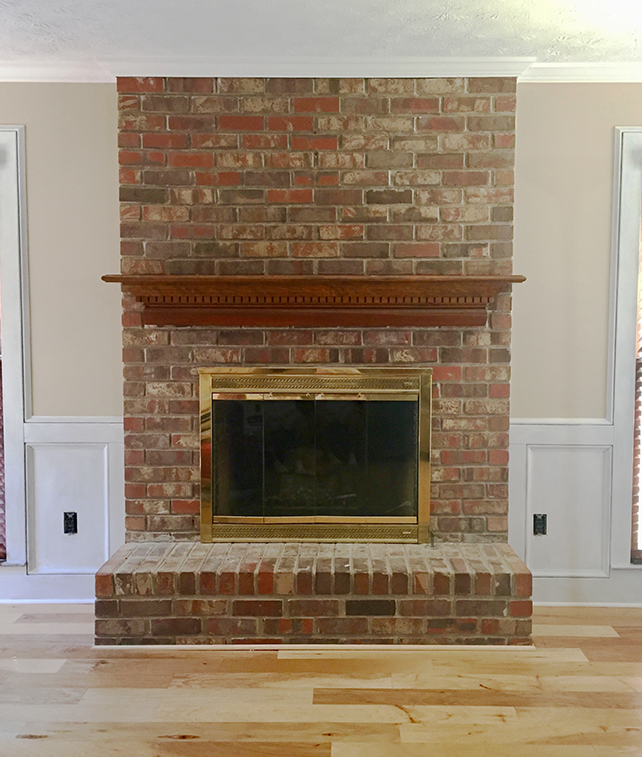
Getting Ready to Whitewash a Brick Fireplace
- Remove mantle…easier said than done. Our mantle was a bit time-consuming to release from the brick because we wanted it to come off in one piece.
- Remove trim around sides and base of brick fireplace
- Use a firm bristle brush to clean brick surface to remove many years (in our case) of dust and dirt
- Vacuum brick surface and also vacuum floor to make sure the bits of mortar are removed that could easily scratch hardwood floors.
- Lay and tape down protective paper to keep paint off surrounding floor. Use painter’s tape to cover edges of walls near sides of brick fireplace
- Select your paint: I used Annie Sloan non-toxic chalk paint that is lead-free, EG-free, odor-free, and low VOC. I used 24 ounces Old Ochre diluted with water 50/50. Approximately $50.00
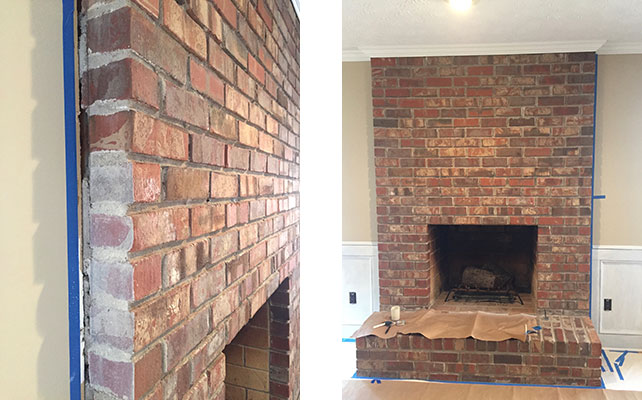
Whitewashing the Mortar and Brick…the process
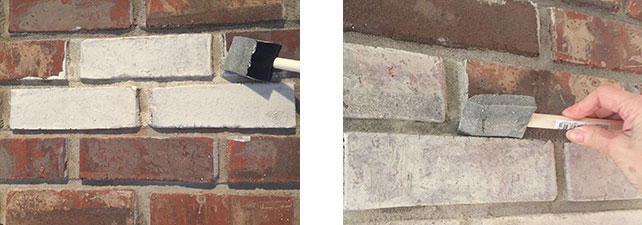
- The process started by using a small paintbrush to apply whitewash into the mortar but I quickly realized that approach would take forever and it was messy and dripped a lot. I then tried a 2-inch foam paintbrush on the bricks as well as on the mortar between the bricks. It worked better but it was important to not overload the sponge or the paint would run. I found that if the paint runs onto the brick below it is difficult to remove all of it. The goal is to evenly apply the paint wash to avoid “drips and runs” that can be seen later once the paint has dried.
- Once the mortar around the brick was painted (actually dabbed), I then wiped the face of the brick with the 2” foam brush so it would be evenly covered with the wash. After 30 seconds or so I lightly wiped off the excess wash. Repeat if you want a lighter look.
Was it Worth it to Spend the Extra Time?
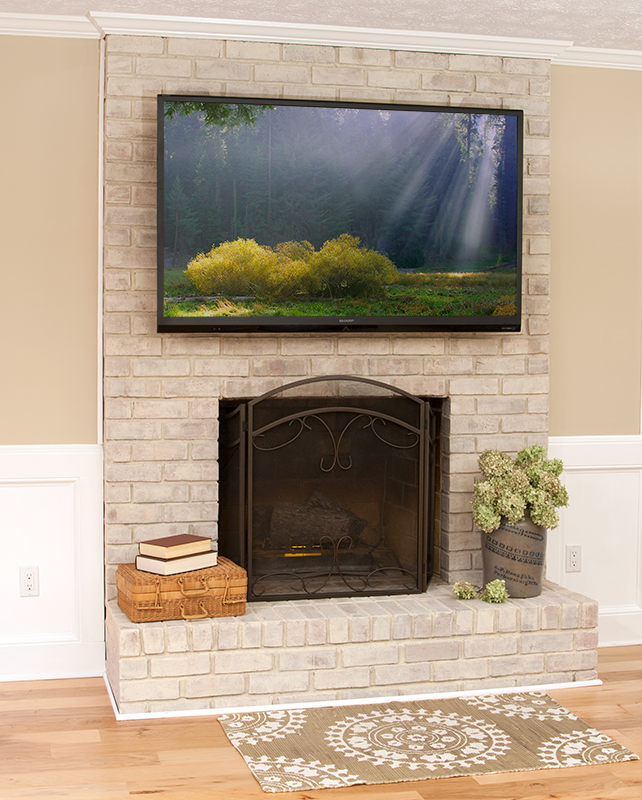
It did take longer to be careful with the drips but I think it was worth it. The bricks in our fireplace had a lot of color variation ranging from red, cream, taupe, brown, and dark gray. I was able to control the look of each brick and have a more customized white wash job. By covering the dark red in the bricks but allowing the warm tones of cream, taupe, brown and gray to show, the fireplace looks more up to date and blends better with the lighter colors on the walls and in the furnishings.
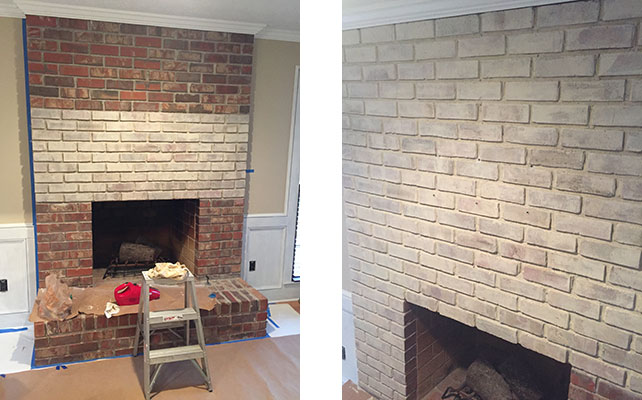
Hint: On my “favorite” bricks (cream, taupe and brown) I used a fine sandpaper to wipe away a bit more wash to reveal the muted original color. I left a heavier wash on the red bricks.
Cut to the Chase Directions
- Sponge whitewash into mortar and dab excess with a rag– avoid paint runs on face of brick
- Wipe sponge across each brick making sure not to let it run
- Let it sit for 30 seconds or so, then lightly wipe with soft cloth
- Evaluate how it looks based on what you are looking for
- Add more wash if you want it whiter, wipe off more if you want more of brick base color to show through.
A question….our fireplace brick is currently only mantle high. I would like to extend the brick to the ceiling, however, the contractor says he can’t match the mortar color to that currently on the mantle height brick. Do you think this difference in mortar color would be noticeable if I whitewashed over both the old and new brick of the fireplace?
Hi Anne, that’s a tough question to answer since there are so many variables, old brick, old mortar, new brick, new mortar. What about just whitewashing the existing brick to lighten and then possibly update with a mantel and accessories? One thing we have noticed with the floor to ceiling brick fireplace it is very heavy and ours needed some reinforcing underneath. Good luck with your project!
Hello! May I ask how long this process of white-washing the fireplace brick took? Thank you.
Hi Terry,
The actual whitewashing of the brick was a fairly quick process once the mantel was removed. First, I tested the paint/water ratio just to see the exact degree of coverage we wanted. After I knew how to get the look I was going for it went quickly. I worked on this project over a couple of days but it could have been finished quicker. It was a fun project that updated the room significantly, and very inexpensively. Thanks for coming by the blog. Good luck with your whitewash project.
Oh, Wow! What a difference. This looks absolutely perfect. Great work and keep it up
The result of this project is really comfortable on the eyes! The fireplace is beautifully incorporated into your softer color scheme and I love your finishing touches on the hearth. The effort to tone down & lift up certain brick colors really paid off!
Thanks for noticing the subtleties.
Attention to detail really pays off. Beautiful result!
Thanks very much. We are enjoying the finished project.