One of the last areas in our 40-year-old house to get an update is the half bath. It has original wallpaper, cabinetry, plumbing, and lighting fixtures. The floor is the “new” part of the room. We replaced it after major first floor damage from a water leak. So, from ceiling to baseboard it’s 1983. But it will soon have a much more current look. Our first project is to remove the very large mirror that has been glued to the bathroom wall since the house was built. After doing the required research to determine a safe and efficient way to do this, I began the transformation of our 1980’s half bath.
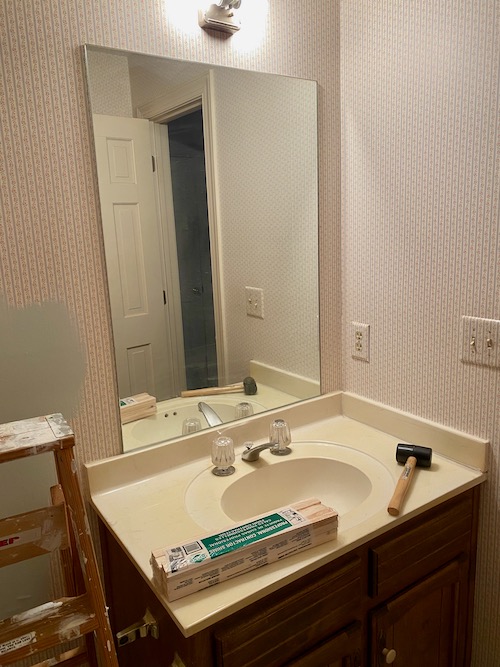
Do The Necessary Research to Assure a Safe and Successful Project
My first step was to gather the tools and products needed to do this job; keeping in mind that this is potentially a very risky project if proper precautions are not followed. The mirror glued to the wall is very heavy and could be dangerous if it were to release from the wall without proper planning. I also researched how others had successfully removed large, heavy mirrors from a wall. Here is one video that I found particularly helpful and would recommend that you watch.
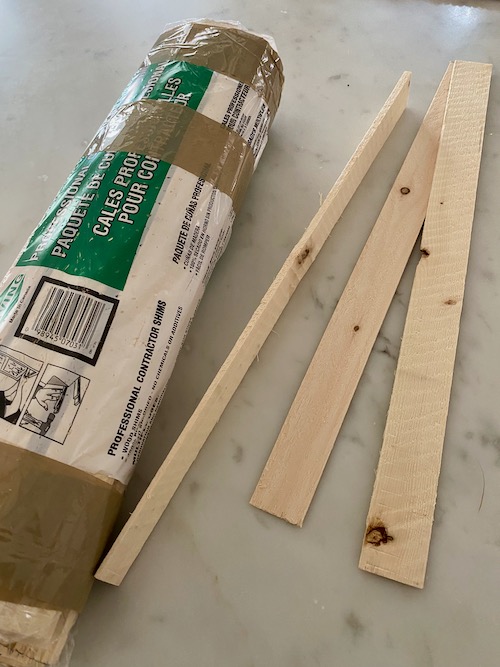
Items Required For This Project
- Package of wood shims
- Rubber Mallet
- Folding ladder (or another item large and heavy enough to support the mirror weight when it releases from the wall)
- Padding, such as a bath towel or throw rug to soften the landing of the mirror onto the top of the vanity cabinet after it releases from the wall
The Step-by-Step Process Used For this Project
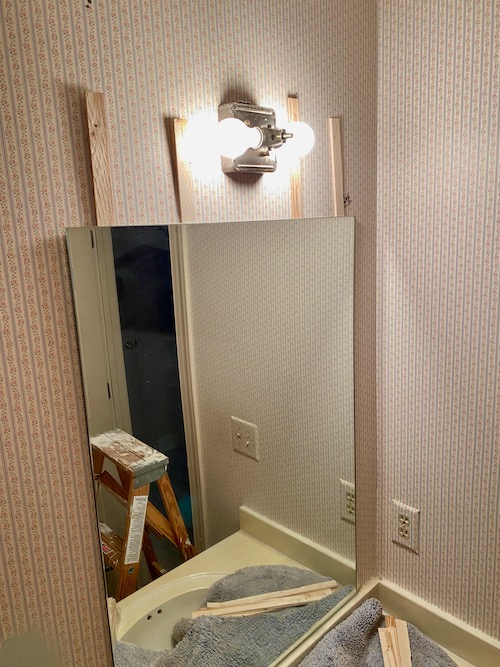
1. Examine Mirror Closely to Know What You’re Dealing With
We looked over the mirror in detail to determine how well it was secured to the wall. We confirmed it was solidly attached and there were no cracks in the mirror before moving forward. Then, we placed 1-3 shims together in 4 places across the top of the mirror as space allowed. We didn’t start tapping on anything yet! The size of the mirror we are removing is 28″ x 40″ and it’s a heavy mirror. If yours is larger please consider getting assistance or hiring a professional.
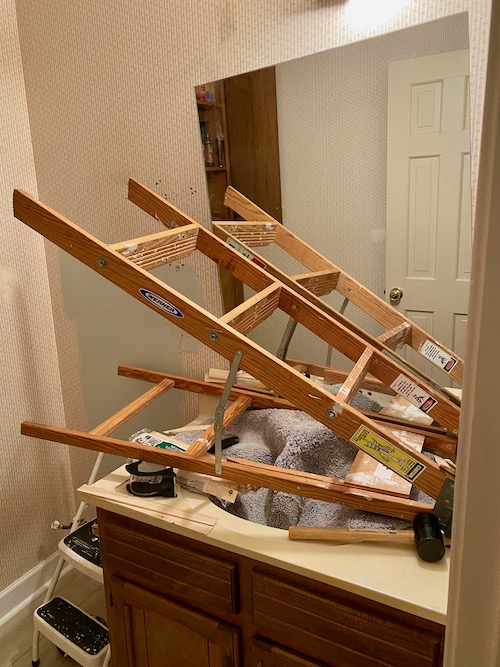
2. Set Up a Barrier to Maintain Control of Mirror
IMPORTANT! Before the next steps, lay the step ladder in front of the mirror sideways between the mirror and the faucet/hot-cold handles with a towel or rug as padding. This is necessary in case the mirror releases early in the process. There is no way of knowing how quickly the glue will release.
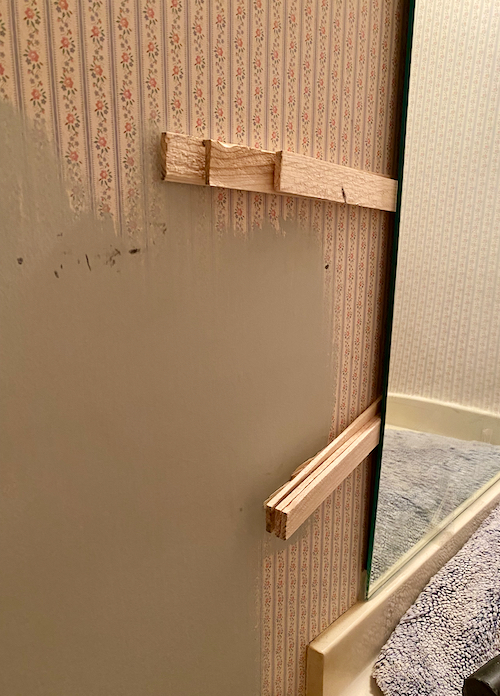
3. Install Side Shims
Stack and Insert 2-3 shims together in 3 places at the side(s) of the mirror every 15-20 inches
4. Tap Shims to Keep Them Snug…and listen!
Next, begin tapping on the shims you placed at the top of the mirror. Tap each set of shims lightly and consistently a few times to keep the shims snuggly fitted behind the mirror. Then, do the same on shims placed along the side (or both sides if accessible). Stop and wait for a while but stay aware of the snugness of the shims, add shims if necessary to keep them firm but don’t push too hard. You are trying to get the glue to gently release,“on its own” from the wall. Keep the room quiet so you can listen for the sound of the glue patches “popping” off the wall.
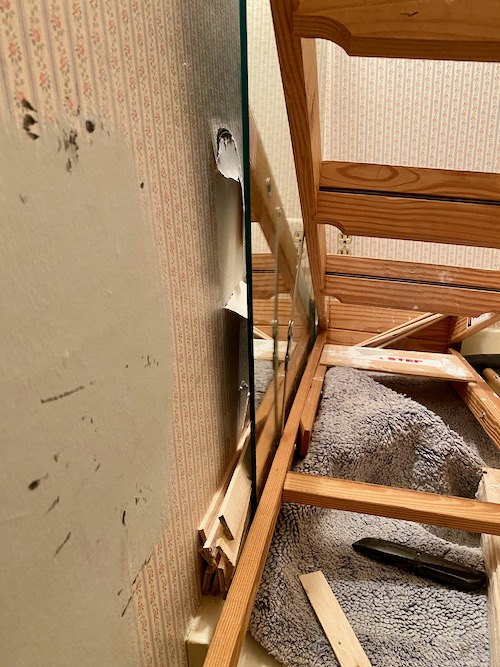
5. Be Patient and Listen
Leave the shims in place and check on them regularly. Continue to tap the shims with the rubber mallet to slowly encourage the tension required to pull the mirror off the wall. Depending on the amount and type of adhesive, timing may vary. We had a significant amount of glue on the back of our mirror and it still came off the wall within an hour.
When our mirror released from the wall it cleared the 1” edge of the backsplash and settled onto the padded countertop without breaking. There is a reflection of the ladder hinge in the mirror that distorts the image.
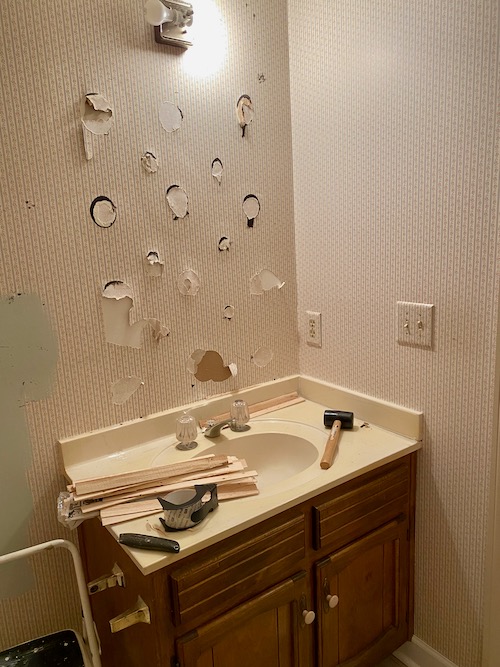
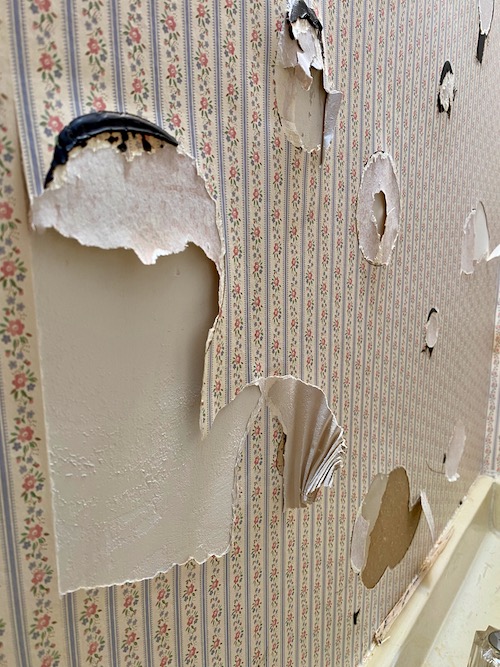
Now that the mirror is off the wall, it’s time to assess the damage?
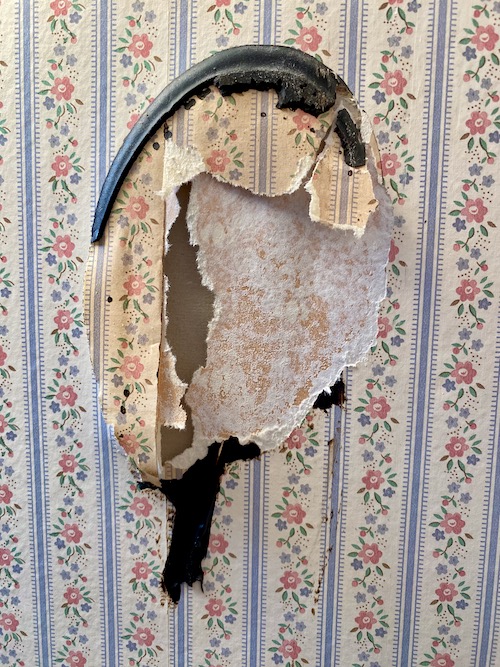
We were relieved when the whole mirror “popped” off the wall quickly and landed exactly where we planned. So far so good…however, there is significant damage to the wall. The original installer applied 18 different sections of glue to the mirror at the time of install. They certainly made sure it would never fall off that wall! Since we’re replacing it with a smaller mirror, we have lots of drywall holes to fill and sand smooth before priming and painting the walls. At that point we can install a new countertop and sink. We have a few other updates in store for the half-bath as well. Check back and see how it all turns out!!
I had to chuckle as I scrolled through the pictures. Our house was built in the late 70’s, and that vanity looks identical to what ours looked like, down to the faucet fixtures and toilet paper holder. There must not have been much to select from in those days. 😀 Thank goodness there are a lot more choices now!
That’s funny. I hadn’t thought about that. At least things were built well…they lasted a long time!
A lot of work. Glad it came off successfully.
Thanks, me too!