Demolition had started on a major kitchen remodel and soon the wall between the kitchen and the family room will be demolished! There lies the problem. There is a giant built-in bookcase on this wall and, as a serious book hoarding family, we really needed to keep it. Since it was a budget buster to have the kitchen contractor do it, we decided to move, refinish and reinstall the built-in bookcase ourselves, but we weren’t looking forward to it.
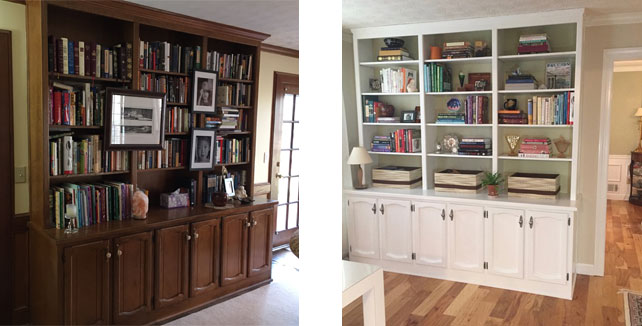
Pressure Is On To Move The Built-in Bookcase
Work on the kitchen was moving along quickly. The contractor had completely gutted the kitchen including ripping out linoleum and drywall. Next, the flooring that surrounded the bookcase was getting ripped up next. So, the time had come to empty and move the built-in bookcase to the living room.
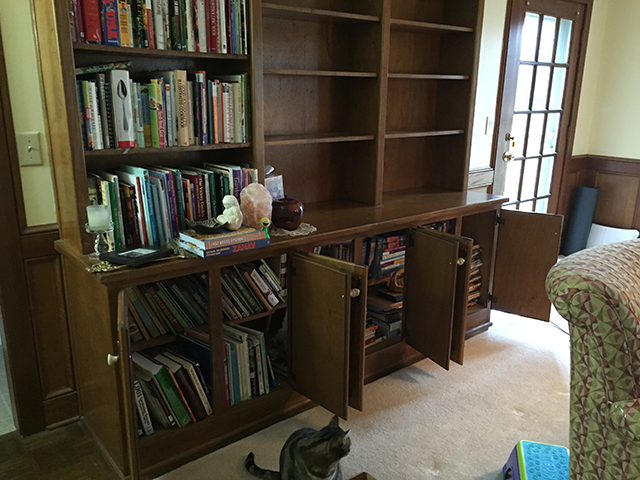
Dismantling The Bookcase From The Top Down
We started this dreaded job by carefully removing and saving the crown moulding around the bookcase. Our house was built in 1983 and this exact style of crown molding is no longer available. So, we were careful removing it so we could reuse it in the living room. We were very careful not to damage the stippled finish on the ceiling as we plan to keep it as is…at least for now.
Next, removed all the screws we could find. Then, we began to dig out very long nails that determinedly held the bookcase to the wall. The carpenters who originally installed this piece apparently assumed there would never be a reason to move it! After significant coaxing it became a sad looking free standing bookcase. There was some damage but it was repairable with some puttying, sanding, and painting.
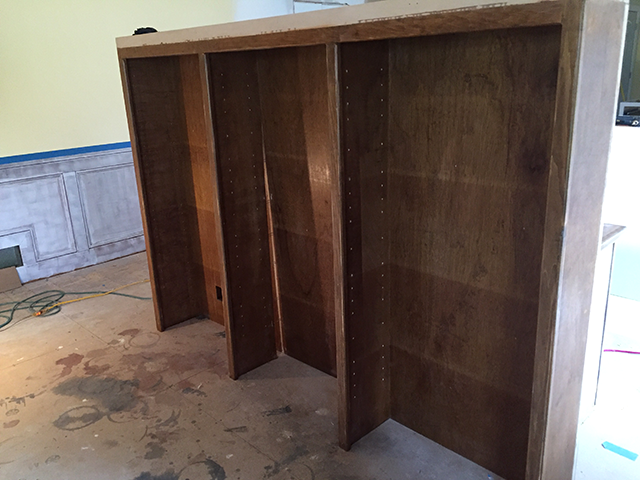
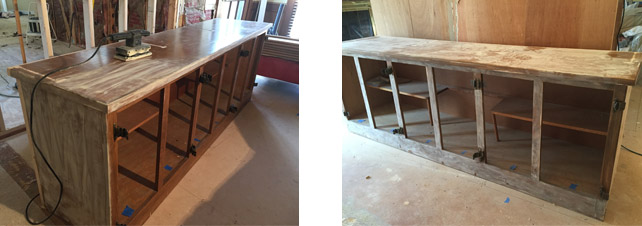
Moving And Refinishing The 80’s Style Bookcase
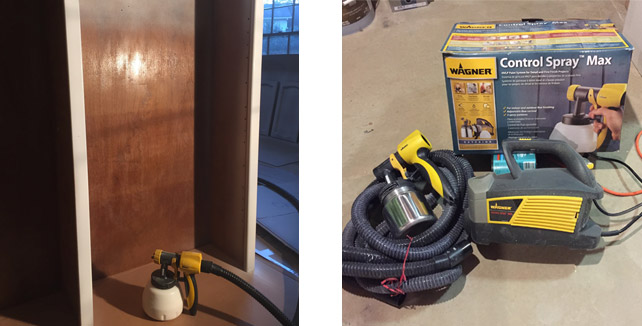
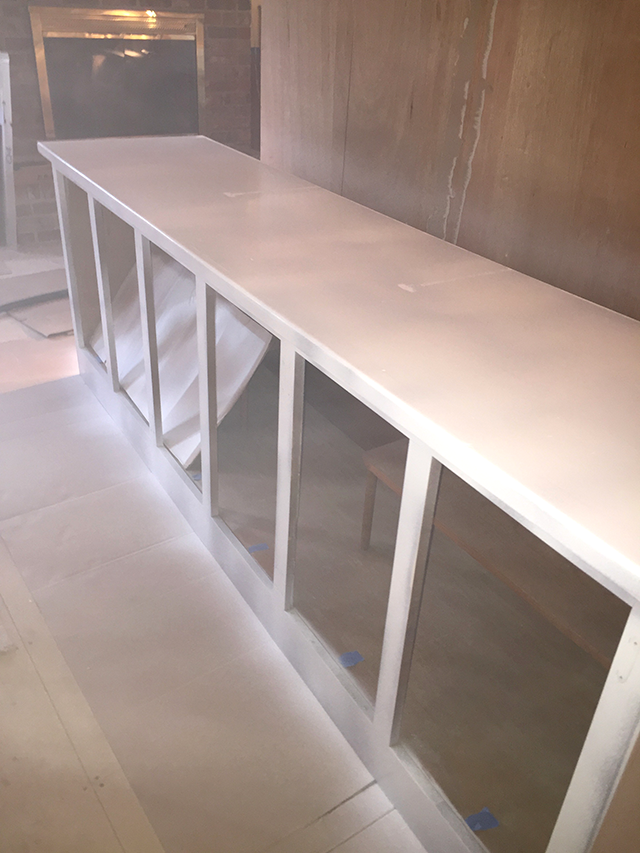
Sanding the bookcase was not fun. It was a dirty, dusty job that required wearing eye protection and a respirator. I vacuumed every inch of the bookcase then wiped it down with a damp cloth. After it was completely dry, I used a Wagner Control Spray Max paint sprayer to apply the primer over both sections of the bookcase. It worked very well and the spray was well contained so I didn’t make a huge mess.
Next Step Is Paint and Prep For Reinstallation
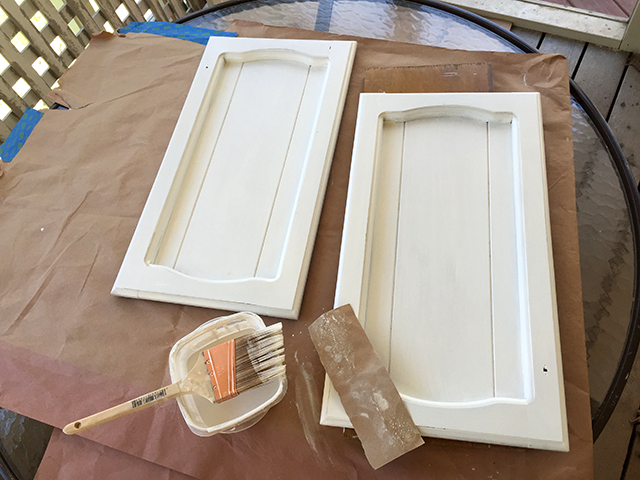
I wanted a nice smooth finish so I chose a good quality paintbrush for the topcoats and added M-1 to the paint to assure a smooth finish. M-1 is an additive like FloetroI and others in that it slows the drying process and allows for a smoother finished surface. It did result in a nice even finish. Be sure to read the instructions on the container for proper amount to add to your paint.
We also removed the crown molding from the new install site as it needs to be refitted around the top of the bookcase. We’ve never cut or installed crown molding before so we’ll need to figure that one out!
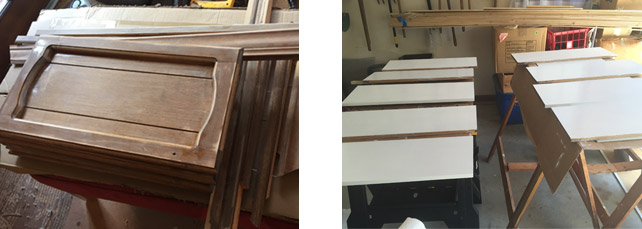
All of the crown molding, plus 6 cabinet doors and 12 shelves were taken to the garage and given a thorough sanding and cleaning. Then, they were spread out on large pieces of cardboard or plastic sheeting for priming and painting. Now that the new hardwood floor has been installed in the house, there would be no more spray painting inside!
Mix And Match Old and New Hardware
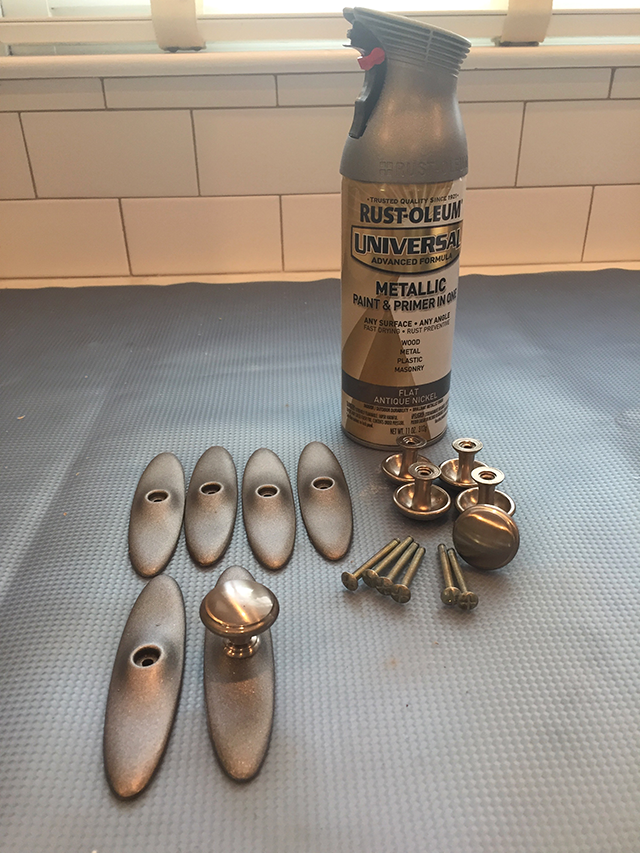
The cabinet door hardware was spray-painted using RUST-OLEUM metallic paint and primer in the flat antique nickel color. The original knobs on the doors were a very 80’s looking beige ceramic with a brass oval plate. We used the same knobs as the kitchen cabinets since we had extra. There was a slight difference in texture between the newly painted old oval brass base and the new brushed silver knob but once it was installed on the bookcase it was barely noticeable.
Finishing Touches Before Installing The Bookcase
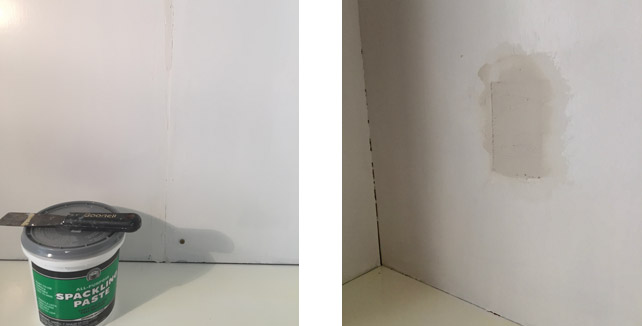
My printer will be in the lower section of the bookcase so in order to have access to the electric outlet we cut a hole in the back of the bookcase. First, we measured where the outlet was and marked the back of the cabinet. Then, we drilled a hole just large enough to slip the jig saw into, then we cut a square large enough to provide access to the outlet. Last, we repaired the hole from the previous outlet by cutting an appropriately sized piece and gluing it in place from the back. We used spackling to fill in around the new piece of wood, let it dry, then sanded the patch smooth before painting.
I didn’t bother painting inside of the bottom storage area. I just didn’t want to spend time on it. I’ll be the primary user of it and it doesn’t matter to me or my printer!
Putting All The Pieces Back Together
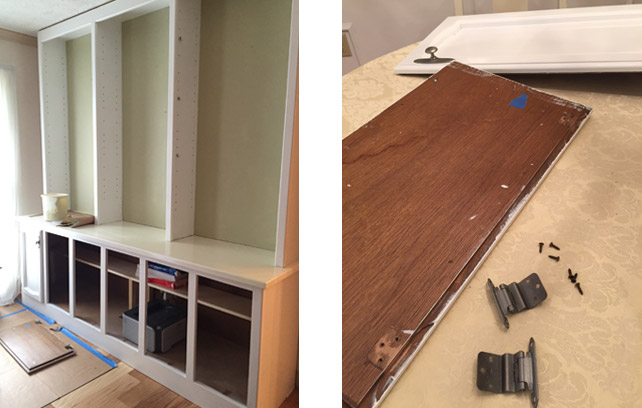
Reinstalling hardware was a breeze since I had marked which hinges go on which doors just to make sure they would fit the same way they had before.
The wall panel behind the shelves is painted the same green color as the dining room nearby. We did this to tie the two rooms together a bit.
The last step in this bookcase move is to prep, sand, prime and paint crown molding, side and floor trim. When fitting the crown molding that was previously around the bookcase we were surprised to notice that it extended down over the top of the bookcase. Then we realized that the new hardwood floor raised the overall height of the floor!
Since the original crown molding was not going to work, I went shopping for an alternative and found a narrower trim that will blend just fine with the existing crown molding. I also selected a side trim that is different from the original but blends well with the bookcase design. So, we just needed to cut them to fit, paint and install.
Moving Back Into The Built-in Bookcase
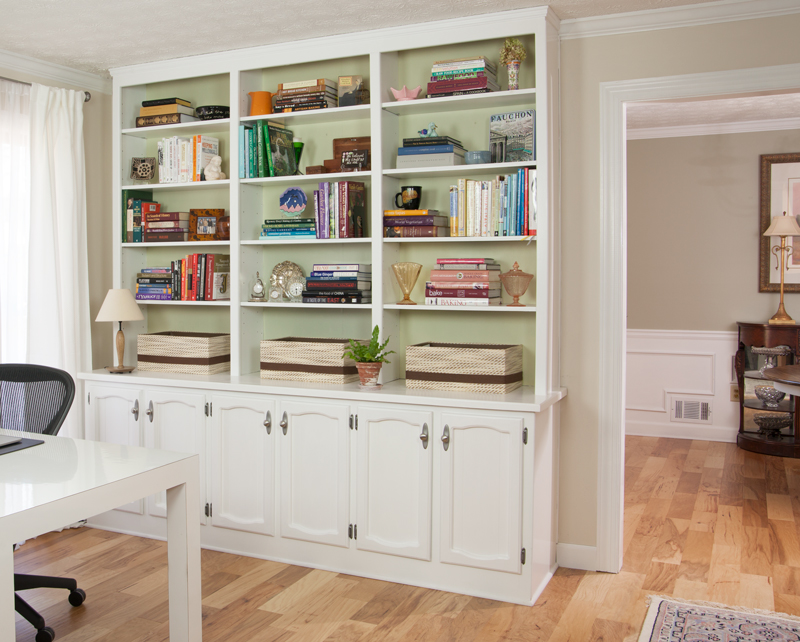
Finally, the bookcase has been moved, refinished, and installed. It’s time to move back in. Since the bookcase will now be part of my office, I’d like it to be more attractive, not just a functional, jammed place for books!
First, I selected the books I want to have close to me, then, I did a serious inventory of my keepsakes, collectibles, and miscellaneous knick-knacks. Since I’m not much of a collector of things like that, it did not take very long at all. In the end, most everything on the bookcase has some story behind it, which makes this project even more special to me. For managing the messy “office stuff” I selected 3 baskets from The Container Store for the top of the base cabinet to hold “office items” such as notebooks, tape, stapler, calculator, pens, markers, post-its, etc…you get the picture. They are handy for me to get to quickly but they are contained and mostly out of sight.I have clear plastic boxes with lids behind the cabinet doors to keep track of less often used items.
I’m very happy with the way the bookcase turned out. This has been a great project in that we reused something we already had and the cost was minimal. Yes, it took a pretty good chunk of time but in the end it has been worth it and will continue to be functional as well as a nice addition to our living room/office area.
Any advice on how you removed the old nails? I am doing something similar but don’t plan on repainting the built in book case (it is currently over a very old wallpapered wall that just has to go).
Removing the nails can be tricky, especially if they have been in place for a very long period of time. Some of ours broke while trying to remove them. We used the nail puller side of a hammer, or if the nail broke off, we tried pulling it out with pliers. However if neither worked, we cut nail off close to the wood and used a nail setter to push it just below surface of the wood and then fill the tiny hole with matching putty. As always, be cautious during this process to avoid any injury.
I love the transformation!
Thanks. It was definitely a long project but we’re happy with the outcome.
You totally transformed this bookcase from a dated look to a current and beautiful piece of built-in furniture. The detailed description and photos encourage me to think how I might use some of my existing furniture and hardware as I finish a kitchen/office remodel and step into a master bath redo. Reusing and sending less to the landfill, as well as respecting my budget are front of mind for me. Thank you for sharing this project.
Thanks so much for your feedback. I understand wanting to save worthy items from the landfill and it’s definitely easier on the budget. Good luck with your upcoming master bath redo.