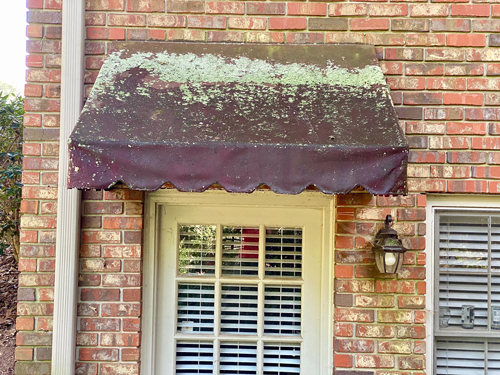
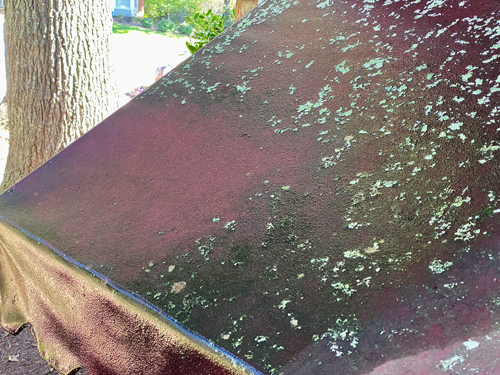
Our awning looks like it has been deep inside a damp forest for years. The truth is, we live in a suburban area of the humid Southeastern U.S. Apparently, it’s the ideal environment for growing lichen and moss. We are planning to do some updates in this patio area soon. But first, we’ll start by cleaning our lichen and moss covered canvas awning. The growth was so thick that before I could scrub it with cleaner, I needed to scrape off as much of the lichen and moss growth as possible. The big question in my mind is whether or not the awning will clean up successfully, or will it need replacing?
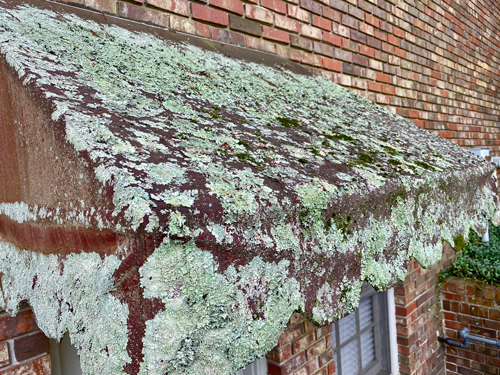
What Exactly Are These Growths?
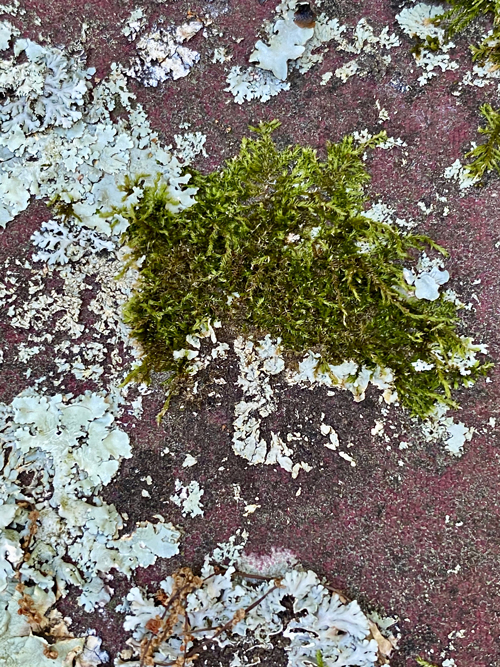
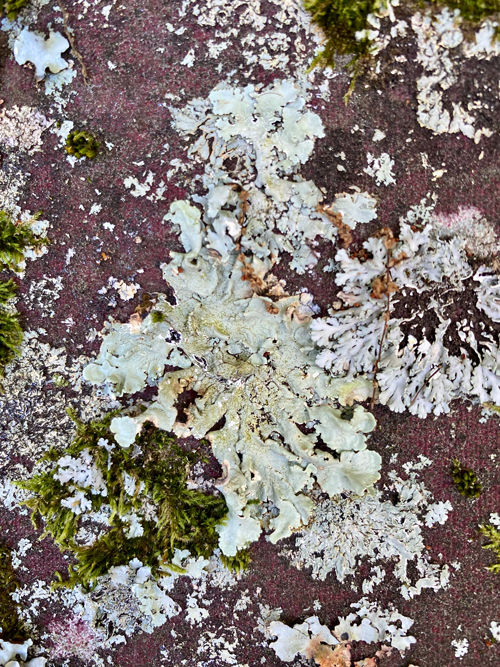
Our first update for this area is to clean the awning. However, before I started the dirty job of removing these delicate yet well-attached growths from the awning, I wanted to know more about the “organism” that was thriving there. After reviewing some university and federal parks-sourced articles about Lichen/Moss growth, I felt comfortable attempting to remove it.
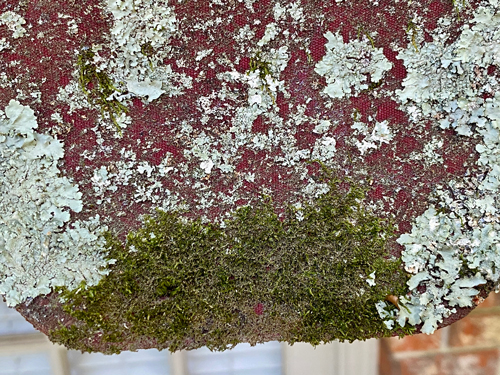
Interestingly enough, during my research, I did not find photos showing the same degree of dense lichen and moss growth that is on our awning! I think we may have a record here!
A Little About Lichens
- Lichens are found all over the world
- No two lichens are alike!
- Lichens are a complex life form of two organisms: a fungus and an alga, but the fungus is dominant
- Fungi cannot produce their own food so they rely on other organisms for nutrition
- Lichens convert carbon dioxide to oxygen and absorb pollutants that are in the area
- Lichens have no roots, stems or leaves
If you’re interested in a bit more information about lichen, here’s a very good 5 minute video.
Transplanting Lichens – Is That Possible?
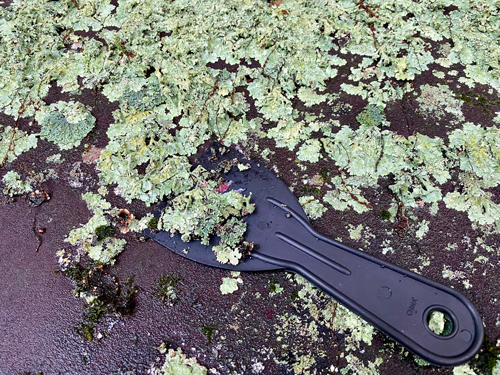
before lifting them off the canvas.
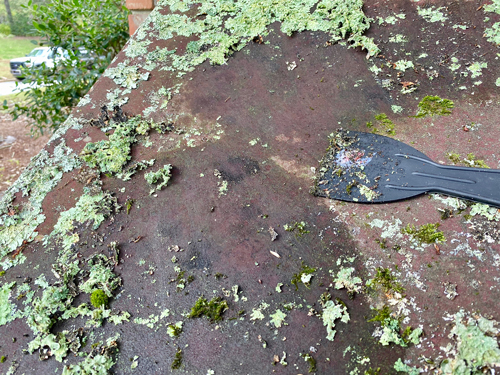
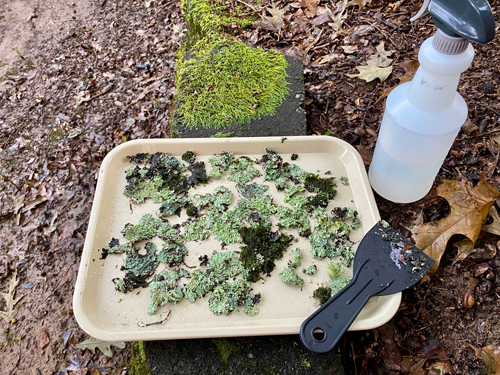
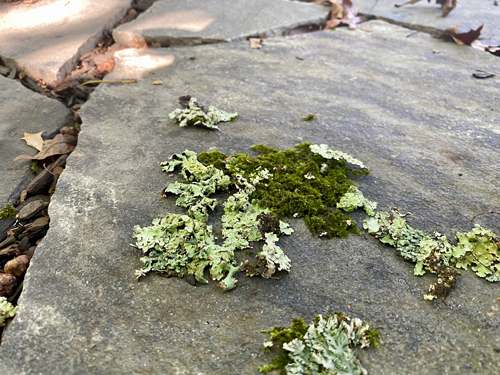
Before scraping off and discarding this beautiful dense lichen growth, I wondered if it was possible to move it someplace where it would survive and continue to grow. I decided to give it a try, and move significant patches of it to the flagstone patio in our woodland garden. Interestingly enough, a couple of days after transplanting the lichens, the patches were settling into their new location and looked healthy so far.
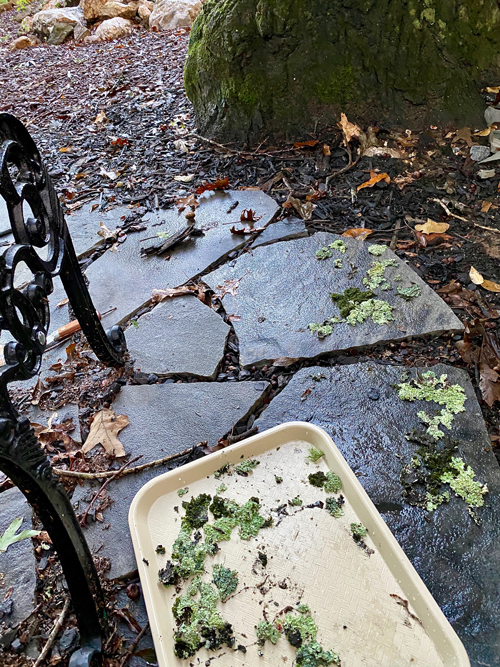
Every day or two I continued to lightly spray the transplants with a fine mist of water from our rain barrel. After 2 weeks they are still healthy looking and the moss is attached fairly well to the flagstone. The lichen is very lightly attached in a few places so far.
First Step Is To Scrape The Entire Awning
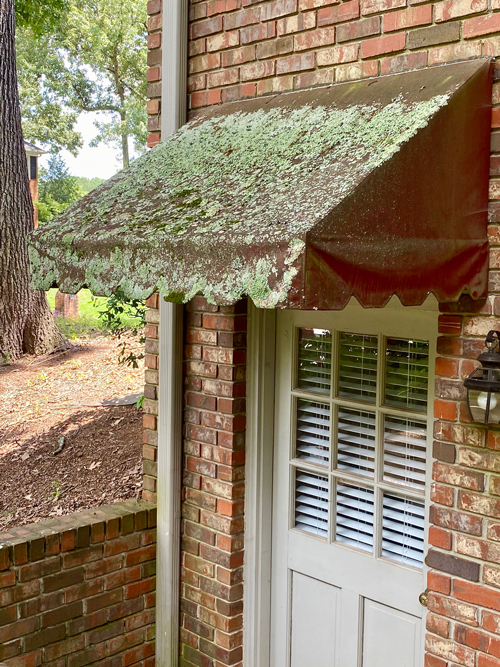
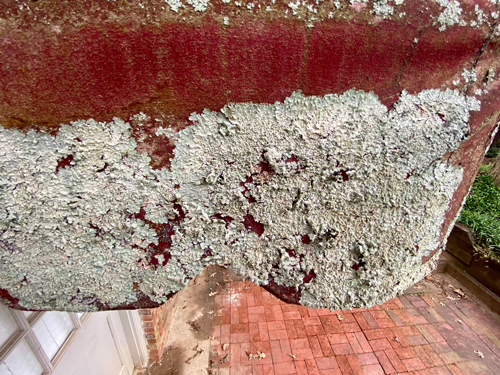
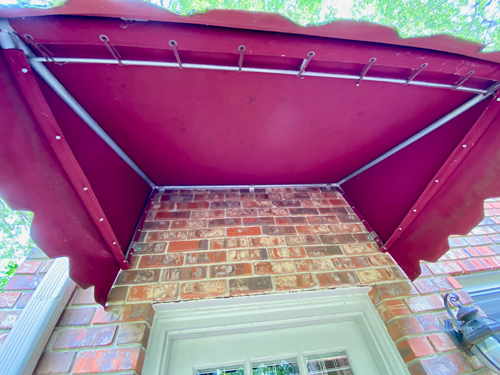
Now that the Lichen moving experiment is complete, its time to get serious about removing those that remain. Using a plastic putty knife, and of course a mask, I scraped the entire area of the awning. The scalloped edge was a bit tricky as it was difficult to get the scraper under the lichen since the edge of the canvas was not connected to the frame. The one pleasant surprise of this project was that the underside of the awning was free of any lichen growth. That area would have been a lot trickier to access for cleaning than the top of the canvas awning.
“DeLichening” This Awning Was Labor Intense!
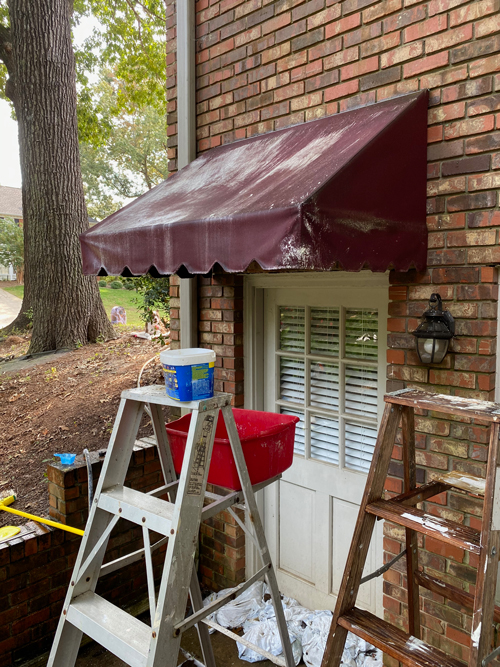
Cleaning the lichen and moss covered canvas awning involved a lot of scraping and scrubbing. I chose to use a non-chlorine granular cleaner (no bleach) just to make sure I didn’t damage the awning color. I removed as much of the lichen concentration as possible by scraping and scraping… Then, I brushed the cleaner into the area and let it soak for 15 minutes or so before rinsing it off. This process was repeated several times in order to lighten the dark stained areas.
detergent
One Cleaning Job Leads To Another
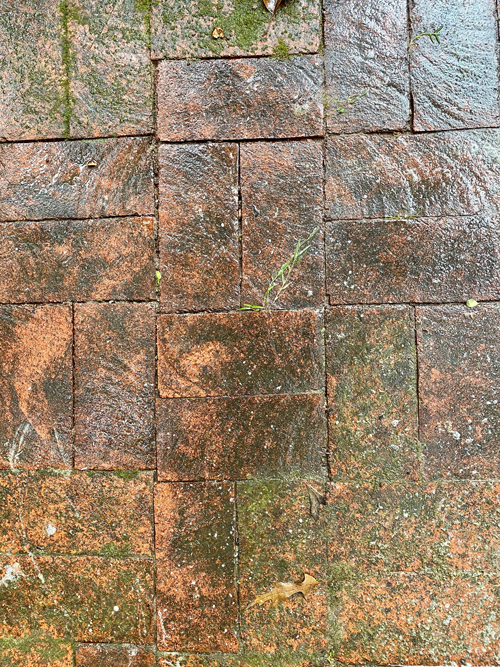
This patio that adjoins the lower level entrance is constructed of bricks surrounded by concrete, and both look nasty. I’m not sure exactly what is making its home here, possibilities include leaf decay, mold, mildew, moss, etc. Whatever it is, it needs to go. Next step, unfortunately, is more scrubbing, this time with a bleach-based cleaner.
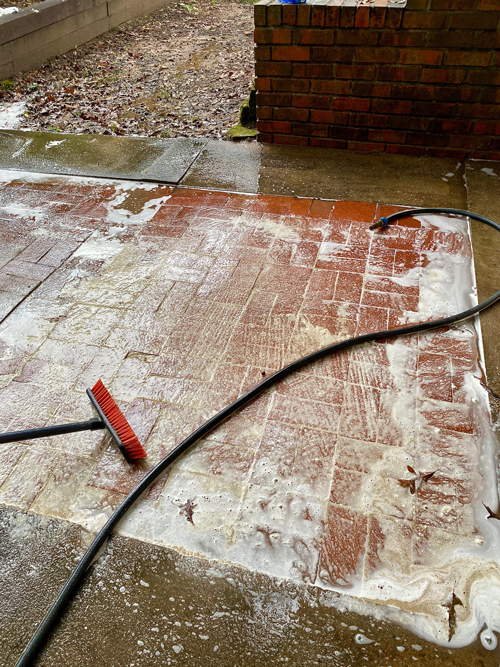
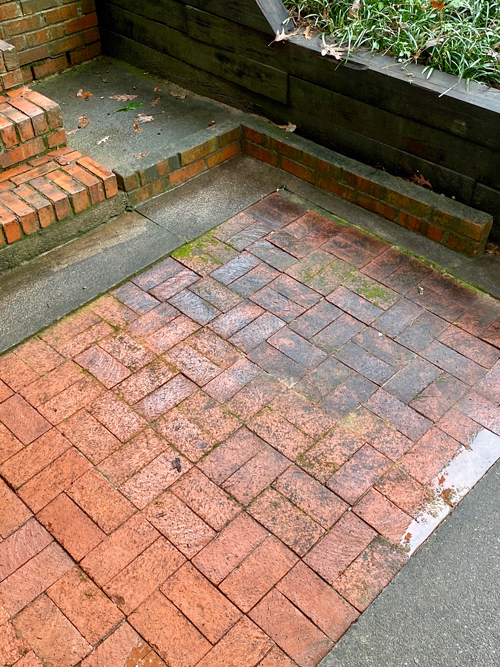
There is nothing like having a very visible difference to justify an exhausting job. There’s more work to do here, but you can see the effort is paying off.
Not Perfect, But So Much Better
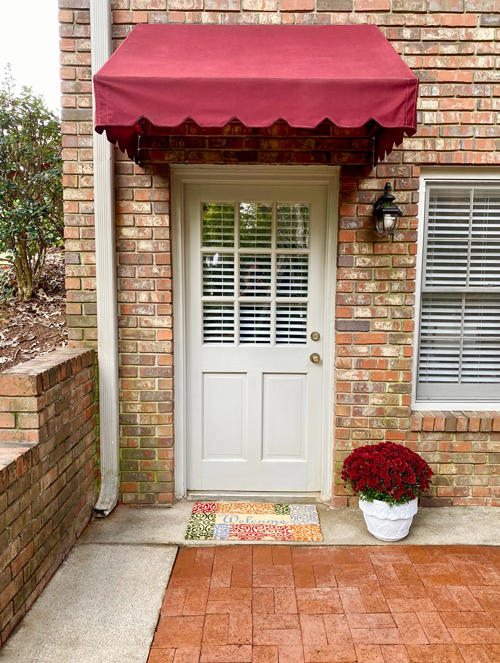
It seems that I always underestimate the amount of physical labor required to get a result I want. Ditto on this one, climbing up and down the ladders, incessant scrubbing, and dragging equipment around, was at the very least an excellent, and lengthy workout, albeit exhausting. We are pleased with the result and plan to enjoy this patio more frequently. The next project for this area is to build a landscaped walkway from this patio out to our neighborhood street. Thanks for continuing to visit our blog. We love having you here and value your comments and helpful feedback.
I attempted a clean up job on an umbrella (similar to your awning) which was covered with moss and lichens. Common here in the Pacific Northwest. I first removed the awning then soaked it in water with Oxyclean dissolved in, for about a week. No scrubbing first, I thought I’d try and loosen it up. I then took it out and put in a lot of muscle work with a scrub brush. Got 95% of it off. For the rest, I’m going to try soaking in more Oxyclean and maybe vinegar. And then probably another scrub. I might add a waterproof sealer after I’m all done to forestall more problems down the road.
Hi Lawrence, it sounds like your attempt at cleaning your umbrella was quite a success! These kind of jobs are always quite a bit of work, but in the end they feel like it’s worth it! Your process and products worked well. I like the idea about the waterproof sealer! Thanks for visiting TEH Blog and for commenting!
Thanks for this article I rescued an antique awning off an old doll buggy it worked great.❤️
I’m thrilled the post was helpful in rescuing the antique awning. I just love saving stuff from the trash!! Thanks for coming by The Emerging Home Blog!
Have you used a waterproofing sealer on your awning?
Hi Judy, no I did not use any waterproofing sealer on our awning. The only product I used was Oxyclean Versatile Stain Remover. Thanks for visiting our blog.
I used a Dawn like dish detergent, scrubbed and rinsed three times. Looks 90% back to original. Not bad for 10 year old awning. I also took the awning down and laid it in the driveway for scrubbing. Easier and safer.
Thanks for coming to our blog. It’s a great feeling seeing a dirty awning look almost new again. I didn’t have the muscle to take the awning down, so I was careful to use a tall enough ladder to balance myself against. I’m glad your project turned out well for you.
Just spent 2 hours scrubbing our rear and front door 5 year old black with white pinstripe awnings which were covered in yellow clay dust from next door’s building site and resultant yellow lichen. We used warm water, a softish scrubbing brush and mild dishwashing detergent, hose rinsed and then did it all again with vinegar and warm water, rinsing again thoroughly with the hose. An equal amount of yellowed water came off in each round. Leaving it to dry overnight because its hard to gauge results when the canvas is damp. Thanks for your article. It reassured me greatly.
Hi Stephanie, thanks so much for your comment. Getting an aged, outdoor awning clean is definitely a labor of love. Sounds like you tackled it with resolve and had great results. Congratulations! I’m so happy our post was helpful. Good luck with future challenging projects!
Would you mind sharing the specific cleaner you used? I tried Oxiclean with limited success. Thanks
I used a 5 lb box of OxiClean Versatile Stain Remover Powder, Chlorine-free and color safe. I wanted to make sure the color in the awning was not damaged. I put the dry powder on the awning, added some water to make a paste and scrubbed with a fairly stiff plastic brush. I let the paste sit on the deeper stains for some time before adding some water and scrubbing again, then rinsing well with the hose. With diligence it worked pretty well and did not damage or change the color of the awning. Hope this helps. Good luck with your project.
Very informative article. I too am trying to preserve some of the lichen and transplant. Before photos of your awning have given me hope. I do think this one wins the prize for best supporting!!!
Thanks so much for stopping by our blog and for your comment. Best of luck in preserving the lichen.
Wow! The awning looks fantastic..the patio brick does as well.
Thanks. I can hardly wait to get started on the walkway to the street.
Your diligence really paid off!!!! Will be a nice cool place to do some serious relaxing when it is nearly 100 degrees in the southern sun. Great job!!!!
Absolutely! We’re looking forward to using the area. Lots of trees to help keep it a cooler, usable space.