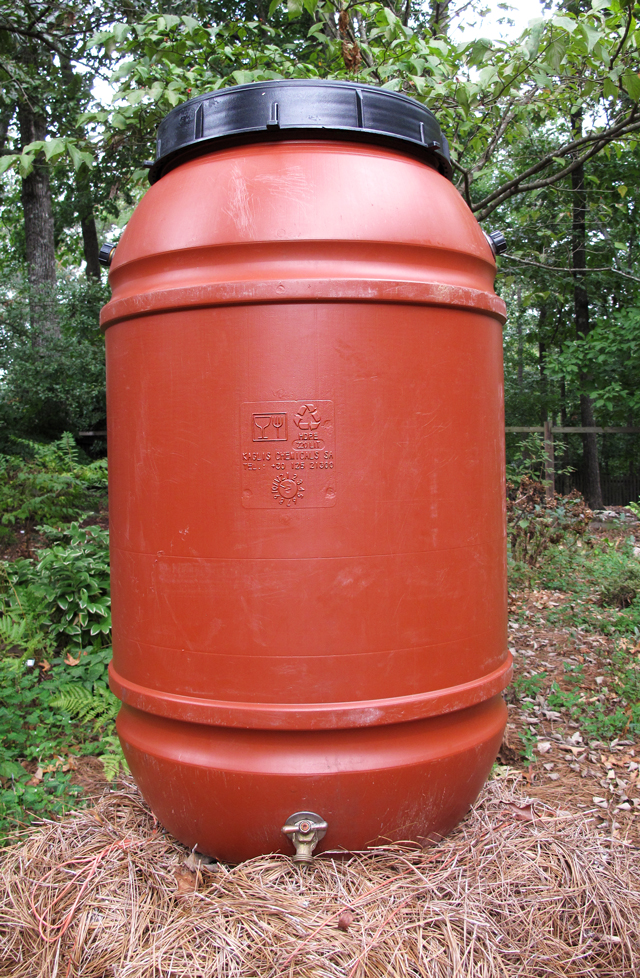
We’re building a wood stand to safely support our 58-gallon rain barrel that will collect rainwater from our roof. During late summer the Atlanta area consistently has long dry spells. This year has been particularly dry. So, from now on we’re going to collect rainwater to keep our plants healthier during these drought times. We’re also hoping to save a bit on our water bill. The biggest considerations when designing and building a rain barrel stand or platform are that it will safely support the full barrel weight and provide necessary height for effective water flow.
Build a Safe and Effective Rain Barrel Stand
Safety must be emphasized as a standard 55-gallon polyethylene barrel can weigh around 22 pounds. Plus, fifty-five gallons of water weighs 460 pounds. So, the platform that will support 482 total pounds of rain barrel weight must be substantially built and dependably stable. The type of rain barrel you use is also important. Its best to keep as many chemicals as possible out of the water you use on your garden.
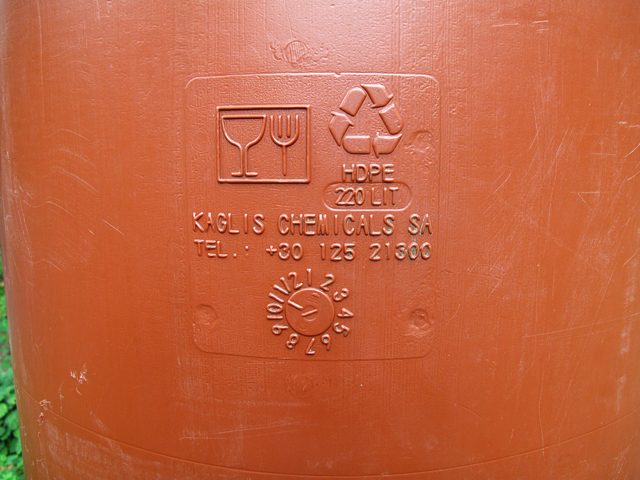
Check the recycling symbol on the water barrel before purchasing. Generally, the numbers 1,2,4, and 5 are safe for food. However, get HDPE #2 if you can, as this high-density polyethylene (HDPE) is one of the most stable and inert forms of plastic.
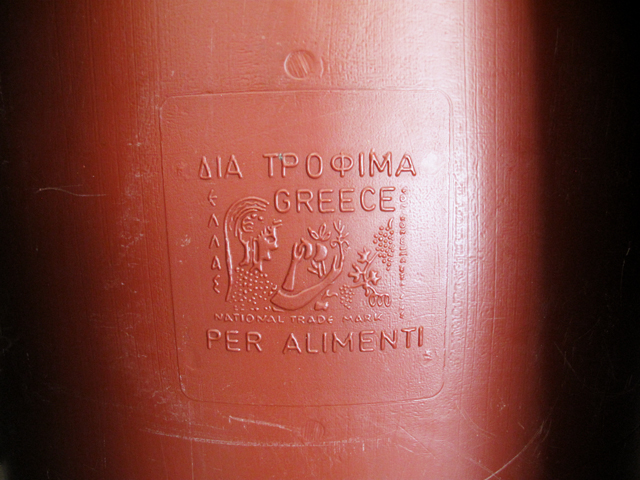
If the image on our barrel is any indication of the contents, it could have been a shipping barrel used to transport Greek olives. If barrels could talk, I’m sure this one would have an interesting story!
Build A Rain Barrel Stand To Increase Water Pressure
Connecting your roof’s downspout to a rain barrel is an economical way to collect water for irrigating lawn and landscape plants during dry spells. However, your time is money, so achieving a reasonable flow speed out of the water barrel is important too!
There’s a very big difference in municipal provided water pressure from your home tap (normally 40-50 PSI) and the rain barrel full of water sitting in your yard. The magic number when it comes to having a functional irrigation system is 10 PSI. Unfortunately, that requires your barrel to stand approximately 23 feet higher than the area you want to irrigate! This is not very practical for most of us.
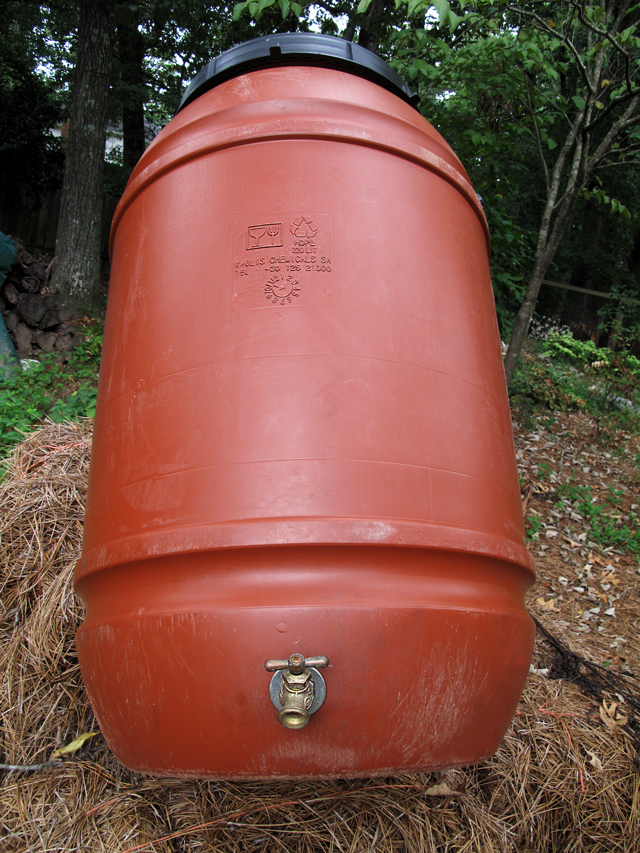
Another point to note is the on/off spigot for water flow from the barrel is logically located at the bottom of the barrel! Unless you’re watering on the side of a hill, you’ve really got to get some height to have decent water pressure. However, if the elevation of your water barrel just doesn’t create sufficient water pressure for your garden, some gardeners choose to use a submersible utility pump to boost water pressure.
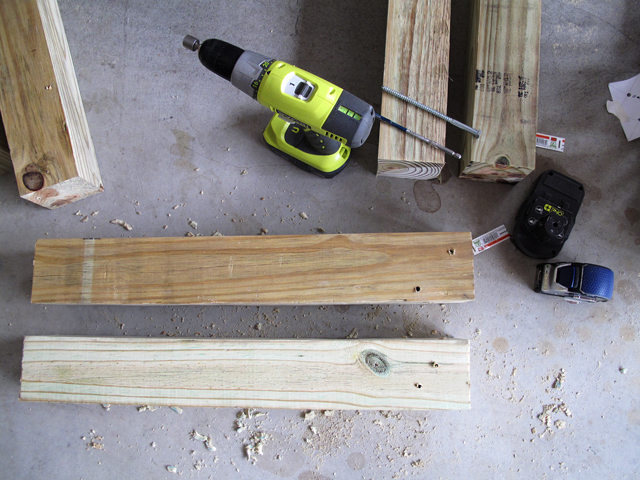
Prepare Lumber, Tools, and Safety Equipment For The Job
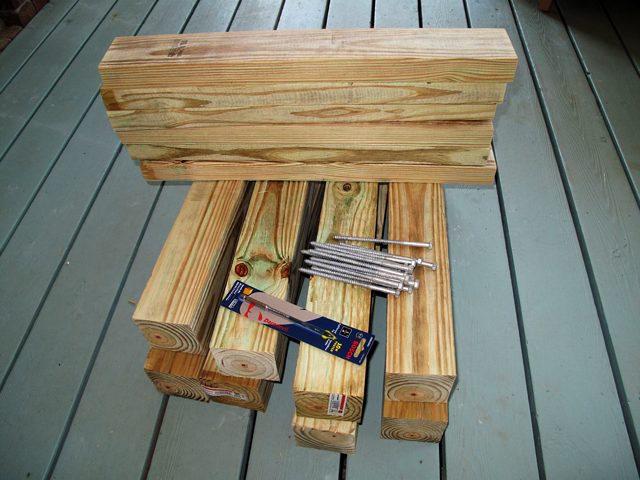
Have a big box store cut your lumber, or do it yourself. Either way you’ll need the following:
– Stand legs: 4 — 4” X 4” pieces of treated wood cut to 24 inches tall (the height and width for your stand may vary depending on your barrel size and the elevation required for your location)
– Frame between legs: 4 — 4” X 4” pieces of lumber cut 16 inches long (connects between each of the stand legs)
– Table top materials: 6 — 2” X 4” pieces of lumber, each cut to 23 inches long
– Appropriate safety equipment. Always!
Note: Why are Two-by-fours and Four-by-fours not the size they say they are? If you’re curious, click here to read a great explanation!
Pre-drill 4″X4″ Wood Pieces For The Base
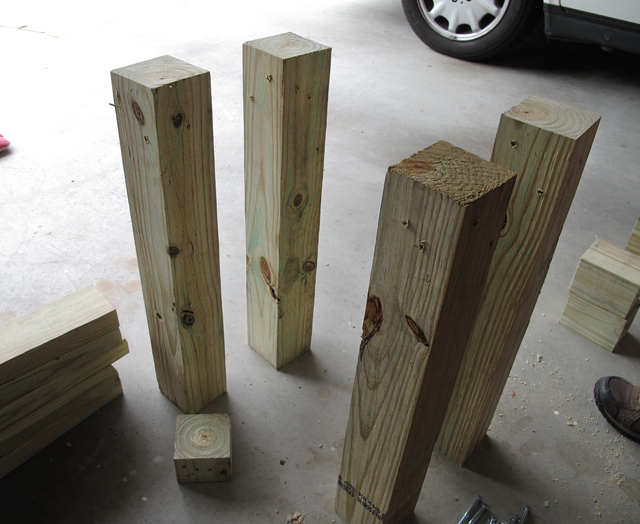
Pre-drill holes in the 4″ X 4″ legs and in the connecting 4″ X 4″ pieces of wood. An important point to remember is to stagger the pre-drilled holes so when you are installing the screws you don’t bump up against another screw. See the finished leg in the photos below regarding the pre-drill pattern we used.
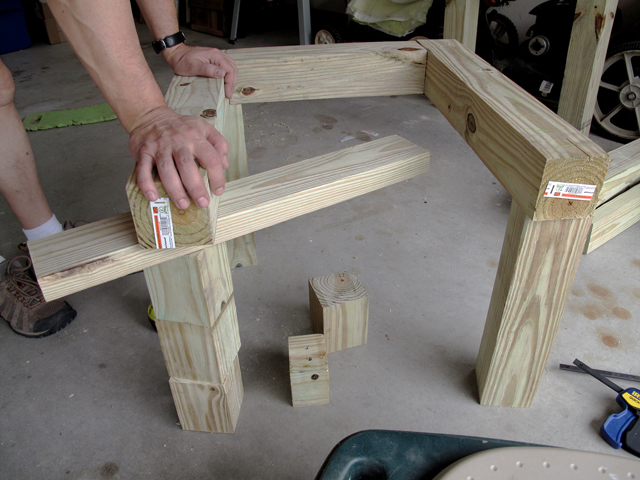
Support the wood well and hold it tightly while the screws are secured into the pre-drilled holes. It was helpful to have the two of us working on this project. One of us held the opposite end of the wood in line and the other drilled.
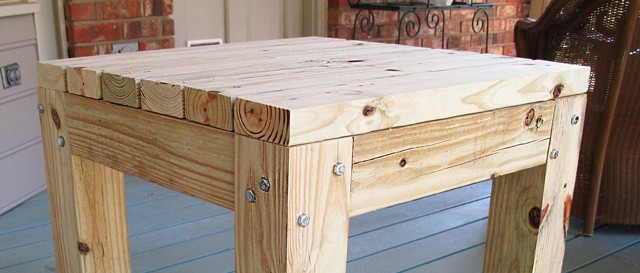
Finish Stand By Securing Two By Fours To Frame
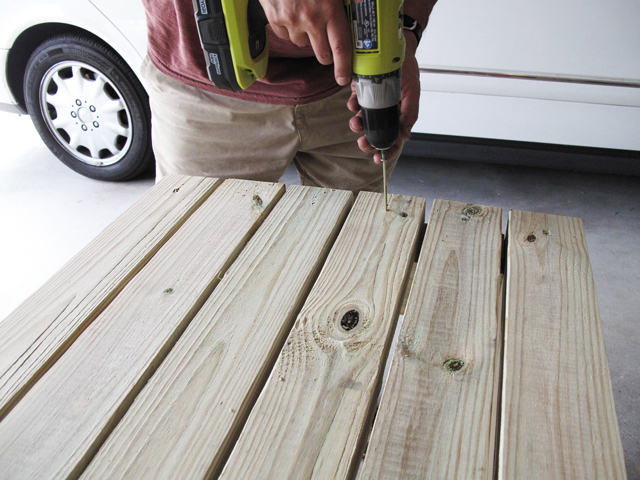
Last step is to evenly space the 2″ X 4″ X 23″ planks and secure them on top of the base. Pre-drilling the holes was not necessary with the 2 X 4’s. Four inch screws were used to secure the top to the base. One screw at each end of the 6 – 2″ X 4″ boards.
Completed Rain Barrel Stand Is Ready To Go To Work
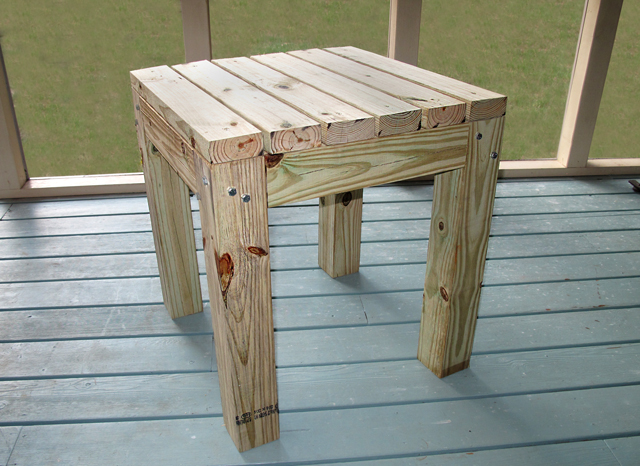
I can hardly wait to get the rain barrel set up and connected to our downspout. It hasn’t rained for weeks but we’ll be ready when it does!
Check back soon to see where and how we installed our new rain barrel and stand.
Greatest write up. I just wonder how would you go about building a double barrel stand?
Thanks.
The first thing we would do is calculate the weight of the full water barrels we plan to use. Then the table should be designed so that it is capable of supporting that projected weight. All the best with your design/build.
These instructions were the best I found. I so appreciate that you wrote about it in an easy to understand manner, listed the items I would need and took great pictures that are in focus (yeah, seems like a no brainer but you’d be surprised). I’m wondering if I can use 1 by 8’s that are left over form a deck project instead of 2 by 4’s. Will it be as strong? My rain barrels only hold about 50 gallons. Also, the wood was given to me by someone who had just finished redoing their deck before they moved and I didn’t ask if it was treated. Is there a way I can tell?
Hi Diann, keep in mind that your 50-gallon barrel, when full, will weigh 400 pounds! I love to be frugal whenever it is safe to do so, but in this situation, we don’t recommend 1″ X 8″ wood for use as the top of the rain barrel stand. We suggest you use the gifted wood for another creative project. There are so many possibilities! Also, regarding your question about how to tell if your 1”x 8” wood is treated or not here’s a link to a great article that might help. https://www.connerindustries.com/how-to-tell-if-lumber-is-treated/
All the best to you and thanks for visiting our blog.
I love the details and list of materials in this blog; I also appreciate the info in the comments. I noticed that there is nothing in the list of tools that includes the two types of screws needed, nor the info on the bit needed for the pre drilling. Is it at all possible to edit the blog so that that info is included? Thanks.
Thank you Lyn, you are right on track with your questions about the water barrel stand construction. I will edit the post to reflect these details. We received excellent feedback from this post and will soon be offering a more detailed downloadable plan of the water barrel table on our blog. In the meantime, the sizes of the screws needed are:
For the legs/connecting to table base: Hex head nails that are 5” long and 1/4 inch in diameter. We predrilled first about 3 1/2 inches to avoid splitting the wood. The second screw used was to secure the tabletop 2X4’s to the leg base. These nails are flat head screws that are 1/4 inch diameter and 3 inches long. We used a 1/16” bit for pre-drilling.
Please don’t hesitate to contact us if you have any other questions.
Jane
Thanks for posting! Just built this stand for my backyard.
That’s great! Thanks so much for letting us know. All the best to you and your yard!
How wide of a drill bit did you use when drilling the holes on the legs, and how thick a screw (aka “lag bolt”) did you use?
Thanks for posting this, very helpful.
So sorry for the delay in getting back to you. It had been a while since we finished this project and we needed to go back and review/find the tools to get the specs. The screws we used were each 6 inches long. The drill bit used for pre-drilling was 1/4 inch in diameter and 6 inches long. Hope this helps. Let me know if you have other questions. Thanks.
Thank you for this detailed instruction. I created a water barrel stand using these steps and it turned out very well. You also brought up an important fact about making sure the plastic is food safe quality for garden set ups. I could not verify that the rain barrel I intended to use has the correct material so I think my rain barrel may have to find another use.
Hi David, thanks for visiting our blog. I’m so glad the water barrel stand post was helpful to you. You are wise to confirm the material of the barrel before using it. The food safe notation was marked directly on the barrel I used. Good luck.
Hi. You mention pre-drilling holes in the legs for 6 inch screws, however it looks like there are bolts in the legs. Is there a reason? If bolts are recommended, what size are they? I am assuming there is a nut on the inside securing the bolt? Thanks
Hi Meredith. We predrilled holes in the legs of the stand to avoid splitting the wood. The long screws have square heads and appear to be bolts but aren’t. No bolts or washers were needed. Let me know if you have other questions. Our water barrel stand is holding up very well. No wobbling at all.
Thanks so much for visiting our blog. Happy New Year.
Meredith,
These bolts are called lag bolts. These lag bolts do no require washers or nuts at the end of them as they will be fasten into each 4×4.
I hope this helps.
Steven, thanks for clarifying the proper terminology (lag bolts) for the screws we used. Our water barrel stand is still standing strong!